Make a heatmap with Mapbox GL JS
In this guide, you will learn how to make a heatmap using Mapbox GL JS. Heatmaps can be used to display large amounts of points in a way that is visually engaging and encourages your audience to explore your map.
Getting started
- A Mapbox account and access token. Sign up for an account at mapbox.com/signup. You can find your access tokens on your Account page.
- Mapbox GL JS. The Mapbox JavaScript API for building web maps.
- Data. In this tutorial, you’ll be using a GeoJSON file of street trees in the city of Pittsburgh from the Western Pennsylvania Regional Data Center.
What is the purpose of a heatmap?
The term "heatmap" can refer to a few different kinds of cartographic visualizations. You may see it applied to presidential election maps, population density maps, or even meteorological maps.
Among maps you'll find on the web, there are two common categories of heatmaps: those that encourage the user to explore dense point data, and those that interpolate discrete values over a continuous surface, creating a smooth gradient between those points. The latter is less common and most often used in scientific publications or when a phenomenon is distributed over an area in a predictable way. For example, your town may only have a few weather stations, but your favorite weather app displays a smooth gradient of temperatures across the entire area of your town. For your local weather service, it is reasonable to assume that, if two adjacent stations report different temperatures, the temperature between them will transition gradually from one to the next.
For the purposes of this tutorial, we are referring to a different kind of visualization that is more useful for showing the density of points over an area. This type of heatmap does not visualize density by aggregating features within a set of boundaries in the way a choropleth map does, but instead displays a continuous gradient between points.
Heatmaps aren't only useful for visualizing point density. They can also help visualize relative differences between those points. You can assign each point a higher or lower importance based on the value of a particular property within the dataset. In this tutorial, you will weight your map by the DBH property in your data. DBH stands for "diameter at breast height" and is a standard way of measuring a tree's diameter at 4.5 feet above the ground. In general, it is safe to assume that a tree with a higher DBH is older and larger. When you give these larger trees a higher weight compared to smaller saplings, your visualization can be an effective approximation of the area that is shaded by trees' leaves.
Heatmap paint properties
To add a heatmap layer to your map, you will need to configure a few properties. Understanding what these properties mean is key to creating a heatmap that accurately represents your data and strikes the right balance between too much detail and being a single, generalized blob.
- heatmap-weight: Measures how much each individual point contributes to the appearance of your heatmap. Heatmap layers have a weight of one by default, which means that all points are weighted equally. Increasing the
heatmap-weightproperty to five has the same effect as placing five points in the same location. You can use a stop function to set the weight of your points based on a specified property. - heatmap-intensity: A multiplier on top of
heatmap-weightthat is primarily used as a convenient way to adjust the appearance of the heatmap based on zoom level. - heatmap-color: Defines the heatmap's color gradient, from minimum value to maximum value. The color displayed is dependent on the heatmap-density value of each pixel (ranging from
0.0to1.0). The value of this property is an expression that uses heatmap-density as the input. For inspiration on color choices for your heatmap, take a look at Color Brewer. - heatmap-radius: Sets the radius for each point in pixels. The bigger the radius, the smoother the heatmap and the less amount of detail.
- heatmap-opacity: Controls the global opacity of the heatmap layer.
Create your map using Mapbox GL JS
Now that you understand the purpose of heatmaps and the paint properties you will be working with, it's time to set up your map. For this example, you will be using the Mapbox Dark template style. You can find the Style URLs for each of the template styles in our API documentation.
In your text editor, create a new index.html file, then copy and paste the below code into it. Make sure to replace YOUR_MAPBOX_ACCESS_TOKEN with an access token that is associated with your account. Once you add this code and save your index.html file, you can preview the file in your browser to make sure you see the map.
Be sure to save and store the GeoJSON file in the same directory as your project. You will also need to run this application from a local web server, otherwise you will receive a Cross-origin Resource Sharing (CORS) error. Python's SimpleHTTPServer is included on many computers and is a good choice if this is your first time running a local server.
<!doctype html>
<html lang="en">
  <head>
    <meta charset="utf-8" />
    <title>Make a heatmap with Mapbox GL JS</title>
    <meta name="viewport" content="width=device-width, initial-scale=1" />
    <script src="https://api.tiles.mapbox.com/mapbox-gl-js/v3.3.0/mapbox-gl.js"></script>
    <link
      href="https://api.tiles.mapbox.com/mapbox-gl-js/v3.3.0/mapbox-gl.css"
      rel="stylesheet"
    />
    <style>
      body {
        margin: 0;
        padding: 0;
      }

      #map {
        position: absolute;
        top: 0;
        bottom: 0;
        width: 100%;
      }
    </style>
  </head>
  <body>
    <div id="map"></div>
    <script>
      mapboxgl.accessToken = 'YOUR_MAPBOX_ACCESS_TOKEN ';
      const map = new mapboxgl.Map({
        container: 'map',
        style: 'mapbox://styles/mapbox/dark-v11',
        center: [-79.999732, 40.4374],
        zoom: 11
      });

      // we will add more code here in the next steps
    </script>
  </body>
</html>
Add your data
You will first need to add the GeoJSON you downloaded at the beginning of this guide as the source for your heatmap. You can do this by using the addSource method. This source will be used to create not only a heatmap layer but also a circle layer. The heatmap layer will fade out while the circle layer fades in to show individual data points at higher zoom levels. Add the following code after the map you initialized in the previous step.
map.on('load', () => {
  map.addSource('trees', {
    type: 'geojson',
    data: './trees.geojson'
  });
  // add heatmap layer here
  // add circle layer here
});
Add the heatmap layer
Next, use the addLayer method to create a new layer for your heatmap. Once you've created this layer, you will make use of the heatmap properties discussed earlier to fine-tune your heatmap's appearance.
For heatmap-weight, specify a range that reflects your data (the dbh property ranges from 1-62 in the GeoJSON source). Because larger trees have a high dbh, give them more weight in your heatmap by creating a stop function that increases heatmap-weight as dbh increases.
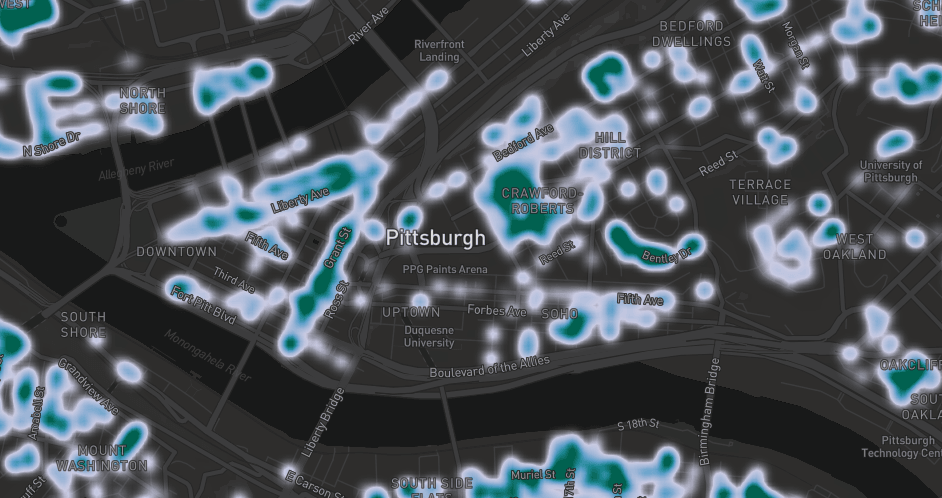
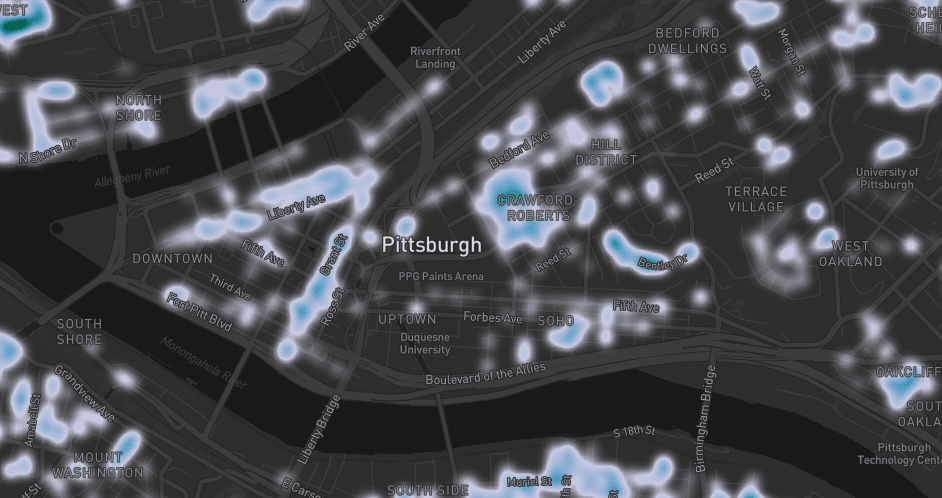
Since heatmap-intensity is a multiplier on top of heatmap-weight, heatmap-intensity can be increased as the map zooms in to preserve a similar appearance throughout the zoom range. The images below show the impact of heatmap-intensity on your map's appearance. The image on the left shows heatmap-intensity that increases with zoom level and the one on the right shows heatmap-intensity that uses the default of 1.


For heatmap-color, add an interpolate expression that defines a linear relationship between heatmap-density and heatmap-color using a set of input-output pairs. If you are interested in learning more about Mapbox GL JS Expressions, read the Get Started with Mapbox GL JS expressions guide and the Mapbox GL JS documentation.
Finish configuring your heatmap layer by setting values for heatmap-radius and heatmap-opacity. heatmap-radius should increase with zoom level to preserve the smoothness of the heatmap as the points become more dispersed. heatmap-opacity should be decreased from 1 to 0 between zoom levels 14 and 15 to provide a smooth transition as your circle layer fades in to replace the heatmap layer. Add the following code within the 'load' event handler after the addSource method.
map.addLayer(
  {
    id: 'trees-heat',
    type: 'heatmap',
    source: 'trees',
    maxzoom: 15,
    paint: {
      // increase weight as diameter breast height increases
      'heatmap-weight': {
        property: 'dbh',
        type: 'exponential',
        stops: [
          [1, 0],
          [62, 1]
        ]
      },
      // increase intensity as zoom level increases
      'heatmap-intensity': {
        stops: [
          [11, 1],
          [15, 3]
        ]
      },
      // assign color values be applied to points depending on their density
      'heatmap-color': [
        'interpolate',
        ['linear'],
        ['heatmap-density'],
        0,
        'rgba(236,222,239,0)',
        0.2,
        'rgb(208,209,230)',
        0.4,
        'rgb(166,189,219)',
        0.6,
        'rgb(103,169,207)',
        0.8,
        'rgb(28,144,153)'
      ],
      // increase radius as zoom increases
      'heatmap-radius': {
        stops: [
          [11, 15],
          [15, 20]
        ]
      },
      // decrease opacity to transition into the circle layer
      'heatmap-opacity': {
        default: 1,
        stops: [
          [14, 1],
          [15, 0]
        ]
      }
    }
  },
  'waterway-label'
);
Add the circle layer
Next, add a circle layer. As you zoom in to your heatmap, the points stop overlapping visually and it is no longer necessary to show their distribution and density. At this point, you can show the points themselves and allow viewers to explore the data interactively.
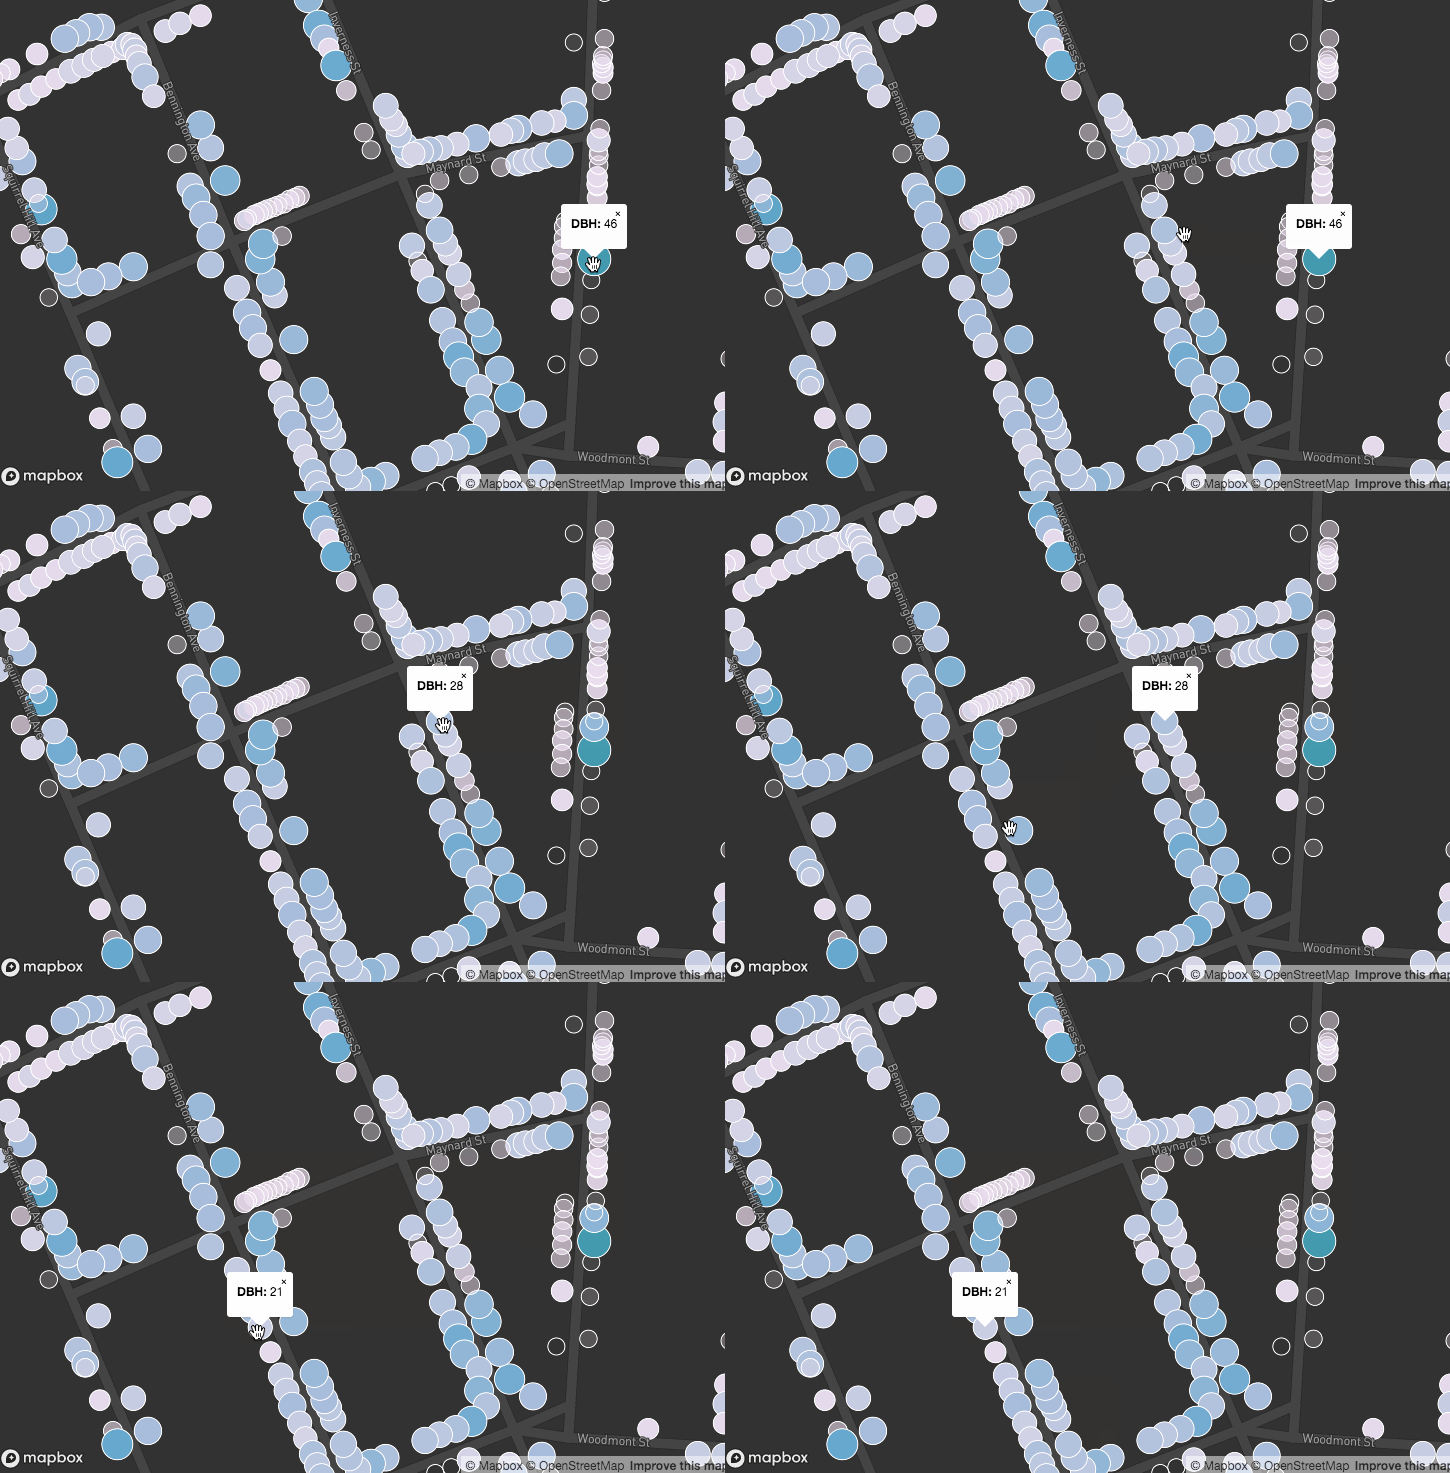
Remember how you used a stop function in the previous step to fade the heatmap layer out between zoom level 14 and 15? You'll need to replace that layer by fading your circle layer in, using a zoom function to increase its circle-opacity between zooms 14 and 15. For circle-radius, use a zoom-and-property function to increase the radius by zoom level and property (as demonstrated below). Add the following code after the heatmap layer you added in the last step.
map.addLayer(
  {
    id: 'trees-point',
    type: 'circle',
    source: 'trees',
    minzoom: 14,
    paint: {
      // increase the radius of the circle as the zoom level and dbh value increases
      'circle-radius': {
        property: 'dbh',
        type: 'exponential',
        stops: [
          [{ zoom: 15, value: 1 }, 5],
          [{ zoom: 15, value: 62 }, 10],
          [{ zoom: 22, value: 1 }, 20],
          [{ zoom: 22, value: 62 }, 50]
        ]
      },
      'circle-color': {
        property: 'dbh',
        type: 'exponential',
        stops: [
          [0, 'rgba(236,222,239,0)'],
          [10, 'rgb(236,222,239)'],
          [20, 'rgb(208,209,230)'],
          [30, 'rgb(166,189,219)'],
          [40, 'rgb(103,169,207)'],
          [50, 'rgb(28,144,153)'],
          [60, 'rgb(1,108,89)']
        ]
      },
      'circle-stroke-color': 'white',
      'circle-stroke-width': 1,
      'circle-opacity': {
        stops: [
          [14, 0],
          [15, 1]
        ]
      }
    }
  },
  'waterway-label'
);
Add some additional interactivity
The following code adds interactivity to your map by allowing your viewers to click on your circle layer to view a popup containing the tree's DBH value. Include the code below after your circle layer.

map.on('click', 'trees-point', (event) => {
  new mapboxgl.Popup()
    .setLngLat(event.features[0].geometry.coordinates)
    .setHTML(`<strong>DBH:</strong> ${event.features[0].properties.dbh}`)
    .addTo(map);
});
Finished product
Congrats! You made your first heatmap with Mapbox GL JS!
<!doctype html>
<html lang="en">
  <head>
    <meta charset="utf-8" />
    <title>Demo: Make a heatmap with Mapbox GL JS</title>
    <meta name="viewport" content="width=device-width, initial-scale=1" />
    <script src="https://api.tiles.mapbox.com/mapbox-gl-js/v3.3.0/mapbox-gl.js"></script>
    <link
      href="https://api.tiles.mapbox.com/mapbox-gl-js/v3.3.0/mapbox-gl.css"
      rel="stylesheet"
    />
    <style>
      body {
        margin: 0;
        padding: 0;
      }

      #map {
        position: absolute;
        top: 0;
        bottom: 0;
        width: 100%;
      }
    </style>
  </head>
  <body>
    <div id="map"></div>
    <script>
      mapboxgl.accessToken = '{{MAPBOX_ACCESS_TOKEN}}';
      const map = new mapboxgl.Map({
        container: 'map',
        style: 'mapbox://styles/mapbox/dark-v11',
        center: [-79.999732, 40.4374],
        zoom: 11
      });
      map.on('load', () => {
        map.addSource('trees', {
          'type': 'geojson',
          'data': './trees.geojson'
        });

        map.addLayer(
          {
            'id': 'trees-heat',
            'type': 'heatmap',
            'source': 'trees',
            'maxzoom': 15,
            'paint': {
              // increase weight as diameter breast height increases
              'heatmap-weight': {
                'property': 'dbh',
                'type': 'exponential',
                'stops': [
                  [1, 0],
                  [62, 1]
                ]
              },
              // increase intensity as zoom level increases
              'heatmap-intensity': {
                'stops': [
                  [11, 1],
                  [15, 3]
                ]
              },
              // use sequential color palette to use exponentially as the weight increases
              'heatmap-color': [
                'interpolate',
                ['linear'],
                ['heatmap-density'],
                0,
                'rgba(236,222,239,0)',
                0.2,
                'rgb(208,209,230)',
                0.4,
                'rgb(166,189,219)',
                0.6,
                'rgb(103,169,207)',
                0.8,
                'rgb(28,144,153)'
              ],
              // increase radius as zoom increases
              'heatmap-radius': {
                'stops': [
                  [11, 15],
                  [15, 20]
                ]
              },
              // decrease opacity to transition into the circle layer
              'heatmap-opacity': {
                'default': 1,
                'stops': [
                  [14, 1],
                  [15, 0]
                ]
              }
            }
          },
          'waterway-label'
        );

        map.addLayer(
          {
            'id': 'trees-point',
            'type': 'circle',
            'source': 'trees',
            'minzoom': 14,
            'paint': {
              // increase the radius of the circle as the zoom level and dbh value increases
              'circle-radius': {
                'property': 'dbh',
                'type': 'exponential',
                'stops': [
                  [{ zoom: 15, value: 1 }, 5],
                  [{ zoom: 15, value: 62 }, 10],
                  [{ zoom: 22, value: 1 }, 20],
                  [{ zoom: 22, value: 62 }, 50]
                ]
              },
              'circle-color': {
                'property': 'dbh',
                'type': 'exponential',
                'stops': [
                  [0, 'rgba(236,222,239,0)'],
                  [10, 'rgb(236,222,239)'],
                  [20, 'rgb(208,209,230)'],
                  [30, 'rgb(166,189,219)'],
                  [40, 'rgb(103,169,207)'],
                  [50, 'rgb(28,144,153)'],
                  [60, 'rgb(1,108,89)']
                ]
              },
              'circle-stroke-color': 'white',
              'circle-stroke-width': 1,
              'circle-opacity': {
                'stops': [
                  [14, 0],
                  [15, 1]
                ]
              }
            }
          },
          'waterway-label'
        );
      });

      // click on tree to view dbh in a popup
      map.on('click', 'trees-point', (event) => {
        new mapboxgl.Popup()
          .setLngLat(event.features[0].geometry.coordinates)
          .setHTML(`<strong>DBH:</strong> ${event.features[0].properties.dbh}`)
          .addTo(map);
      });
    </script>
  </body>
</html>