
 Install in Dash
 Styling the UI Reference
Styling the UI
If you’re using NavigationMapViewController, it’s possible to apply custom fonts and colors to various parts of the UI.
Create a new Style class
Subclass DayStyle, and make the necessary changes:
class CustomDayStyle: DayStyle {

    required init() {
        super.init()

        // Use a custom map style.
        mapStyleURL = URL(string: "mapbox://styles/mapbox/satellite-streets-v9")!

        // Specify that the style should be used during the day.
        styleType = .day
    }

    override func apply() {
        super.apply()

        // Begin styling the UI
        BottomBannerView.appearance().backgroundColor = .orange
    }
}
You can even provide a custom night style that will be used at night and while the user is in tunnels.
class CustomNightStyle: NightStyle {

    required init() {
        super.init()

        // Specify that the style should be used at night.
        styleType = .night
    }

    override func apply() {
        super.apply()

        // Begin styling the UI
        BottomBannerView.appearance().backgroundColor = .purple
    }
}
Initialize NavigationMapViewController with these styles
let navigation = NavigationViewController(for: route, directions: Directions, styles: [CustomDayStyle(), CustomNightStyle()], locationManager: nil)
Finding elements to style
The easiest way to find elements and their class name to style is to use the Debug View Hierarchy feature in Xcode.
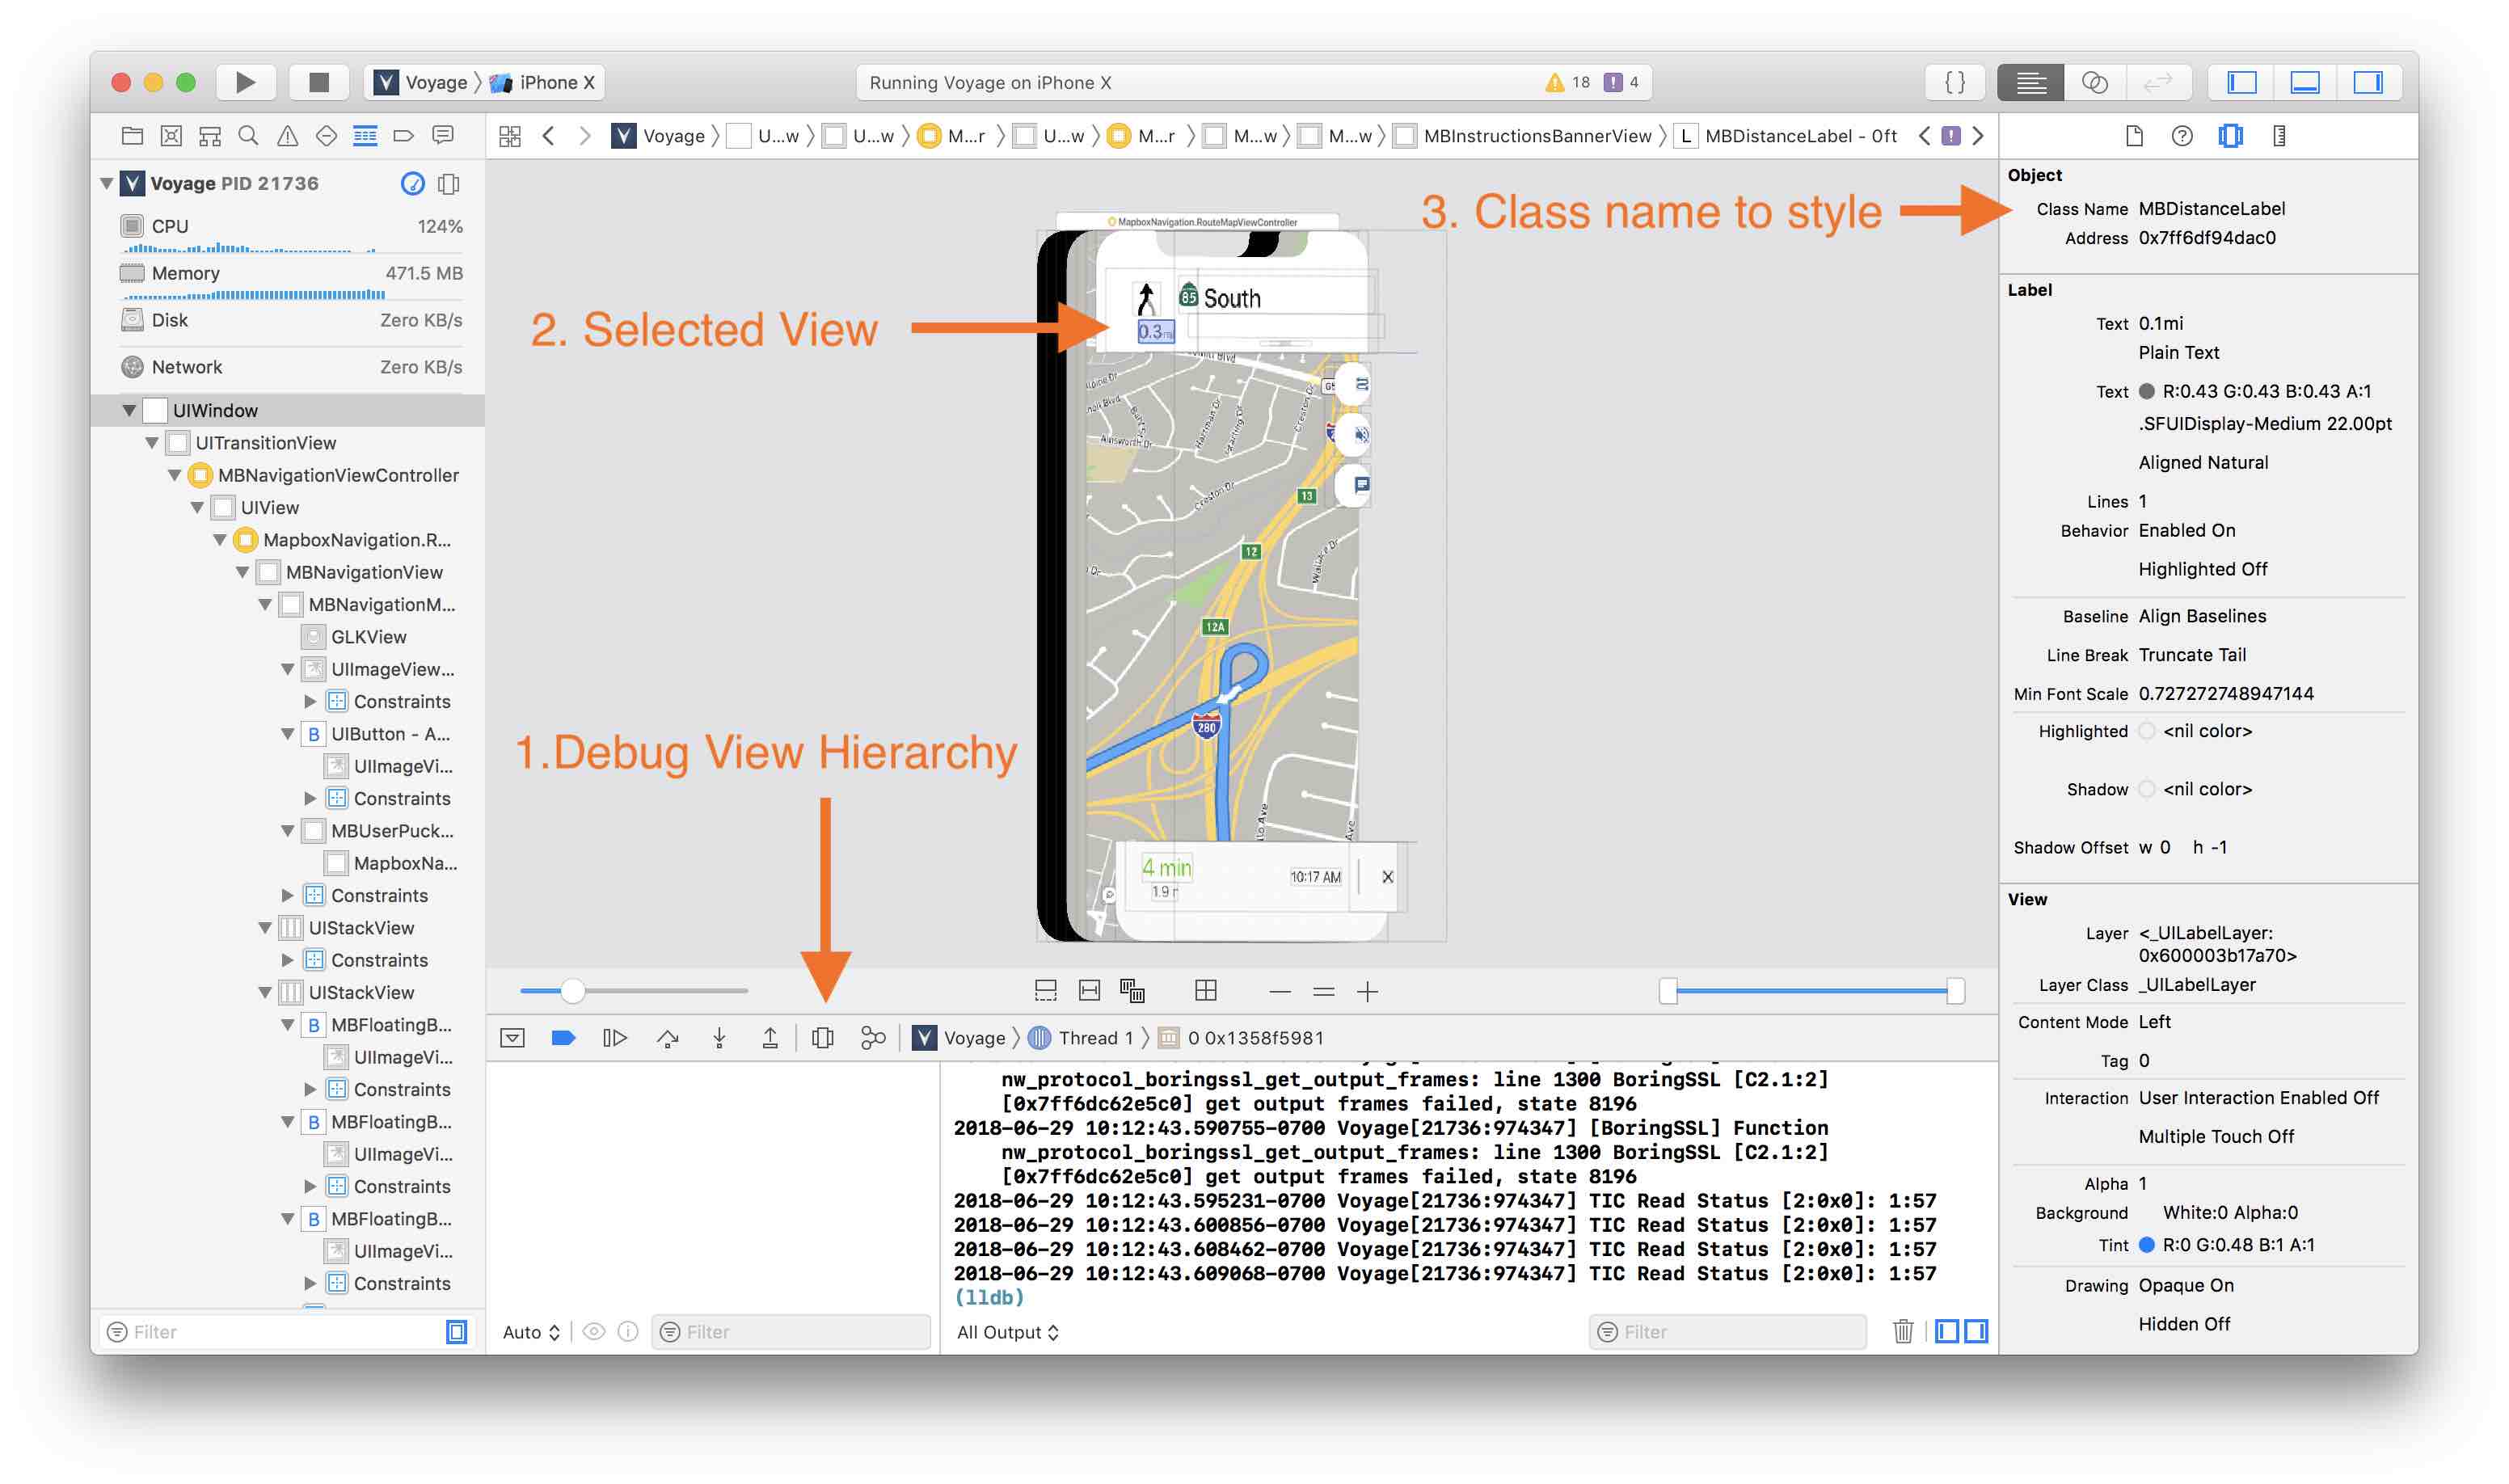
- While running your app, select the Debug View Hierarchy button.
- Select the view you wish to style.
- On the right side of your screen, note the class name.
- Apply your styling:
DistanceLabel.appearance(whenContainedInInstancesOf: [InstructionsBannerView.self]).unitTextColor = .red
It is also helpful to view the default styling applied by the DayStyle.